Django Allauth (2) – Installation and Initial Settings

The first steps to using django-allauth are installing it and adding initial settings. In this chapter, we continue to use the employee learning app to demonstrate django-allauth settings and functionalities.
1. Install django-allauth
To install django-allauth, add it to requirements.txt.
Django==4.1.7
django-crispy-forms
crispy-bootstrap5
django-allauth
Run the command below to install django-allauth.
pip install -r requirements.txt
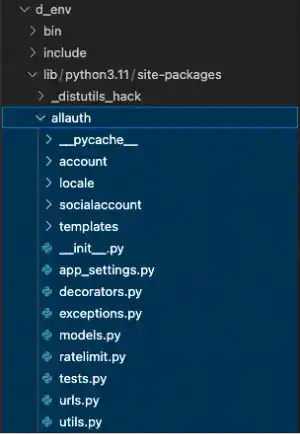
Check the project directory tree. You can find that the allauth directory is created under d_env/lib/python3.xx/site-packages like in the image below.

The important file and directory are:
- The urls.py file under the account directory
- The templates directory located immediately under the allauth directory
The urls.py contains urlpatterns for user authentications. The templates directory contains many HTML templates that are used for user authentication UIs.
2. Edit settings.py
Add apps
The following apps are required according to the official document. Some apps are already registered. Add the ones in yellow.
INSTALLED_APPS = [
      :
    'test_app',
    'employee_learning',
    'crispy_forms',
    'crispy_bootstrap5',
    'django.contrib.sites',
    'allauth',
    'allauth.account',
    'allauth.socialaccount',
]
Add Site ID and Authentication Backends
Add the code below at the end of settings.py. To make the section in the settings.py file clear, you can add ### django-allauth settings### in the beginning. The comments in green are the comments from the official documentation. The comments explain why we need these settings.
### django-allauth settings ###

SITE_ID = 1

AUTHEN
Subscribe now for
uninterrupted access.