Generating PAT (Personal Access Token)

To establish HTTPS connection, you’ll need PAT (Personal Access Token). There are two types of PAT: Tokens (classic) and Fine-grained tokens (beta version as of 2023 September). When you use the Fine-grained tokens, you can add more detail settings. For the beginner practice purposes, we'll explain how to set up PAT using the classic one.
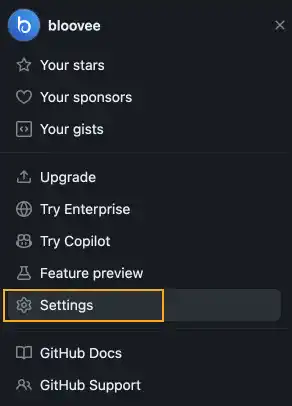
1. Log into GitHub and go to user settings
Go to the GitHub website (GitHub), click on your icon, and press the Settings button.

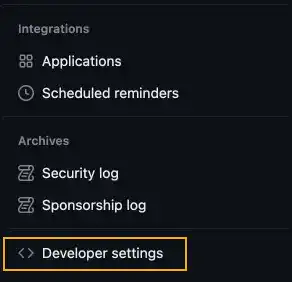
2. Move to Developer Settings page
Go to the bottom of the left sidebar and select Developer settings.

3. Generate a new token
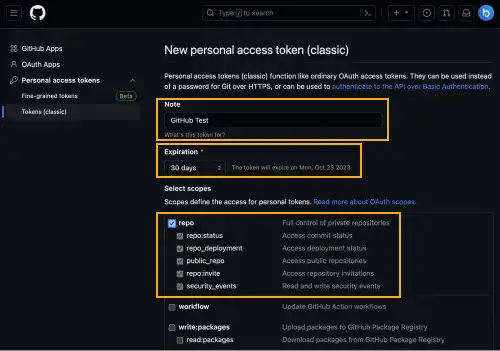
Select Tokens (classic) under Personal access tokens and press the Generate new token button. Select Generate new token (classic).

Add Note (describe what the token is for) and set Expiration. After the token expires, you need to generate another token.
In the Select scopes section, you need to check repo to get access to your Private Remote Repositories. You can add other scopes later when required.

Press the Generate token button.

When a new token is successfully generated, you’ll see your PAT. Make sure you’ll copy it and save it somewhere as it won't be shown again.

When PAT is used?
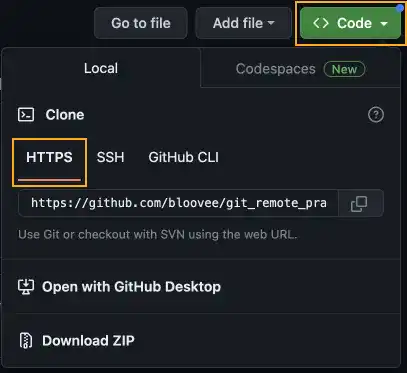
PAT is used when you establish an HTTPS connection to your Remote Repository. To establish HTTPS connections going forward, go to your repository on GitHub and press the Code button. Make sure to select the HTTPS tab to get the URL for HTTPS. (the URL for SSH is different). This URL is used when you run the clone, push, or pull command.

When you clone, push, or pull, you’ll be asked for your username and password. You need to use PAT instead of the GitHub password. Previously, it was a GitHub password, however, GitHub changed the rule to strengthen the security level. How to establish an HTTPS connection will be explained in the later chapters along with the key git commands: git clone, git remote, git push, and git pull.