Git User Settings – git config

The next step after Git installation is registering your user profiles on Git. On this page, we'll cover the following items relating to the initial Git configurations.
- Register your user name and email address
- Register a text editor
- Check configured settings
- Clear configured settings
1. Register your username and email address
Git tracks who made changes. To track change history with editor information, you need to register your username and email address first before using Git.
To register a username, type and run the following code in your command prompt.
git config --global user.name [your username]
To register an email address, run the following code.
git config --global user.email [your email address]
Note: The --global option is used to apply settings to the user of the computer. If you don't use this option, the settings will be registered only to the Local Repository you are working on.
2. Register a text editor
When you run the git commit command, you need to add notes in the text editor. The default text editor is normally Vim, however, using a more advanced text editor increases your productivity. Some text editors can be integrated with GitHub to build more seamless operations.
To register your text editor, run the following command.
git config --global core.editor “[editor path] --wait”
In this course, we'll use Visual Studio Code (VSC). code is the editor path of VSC. To use the path, you need to register it on your computer when installing VSC.
3. Check user settings
To confirm the setting, you need to run the following code.
git config --global --list
4. Unset user settings
The settings you made can be modified. Use the --unset option to clear your settings and register new settings. For example, if you want to change your username in the Git configuration, run the following code to unset your username.
git config --global --unset user.name
Practice
Objective:
Set up a Git user
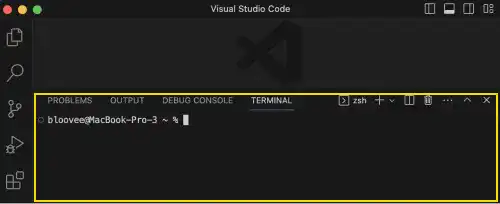
1. Open the command line in VS Code
Open VS Code and open a new terminal. The image below is an example of Mac OS.

2. Register your username and email address
To register a username and an email address, run the following code in the terminal. We'll be using a bloovee account as an example in this course.
git config --global user.name bloovee
git config --global user.email bloovee@example.com
You can see if your username and email address are successfully registered by running the command below.
git config --global --list
You’ll see the status of the username and email settings like the one below.
user.name=bloovee
user.email=bloovee@example.com
3. Register your text editor
Next, register your text editor. In this case, we'll be registering Visual Studio Code (VSC). code is the editor path of VSC.
git config --global core.editor "code --wait"
Check the status by running the git config --global --list command
git config --global --list
you’ll see that the editor is also registered as shown below.
user.name=bloovee
user.email=bloovee@example.com
core.editor=code --wait
4. Unset user settings
Deregister username, email, and text editor by running the following command.
git config --global --unset user.name
git config --global --unset user.email
git config --global --unset core.editor
Check the status by the git config --global --list command, and you’ll see that all the settings are cleared.
 Local configuration
You can also set different user profiles for each project. To set local configulations, run the git config command without any options or with the --local option. You need to run the command in the project directory where your Git Local Repository exists. How to create a Local Repository will be explained in the next chapter.