Implementing Web APIs with Free APIs

Web APIs provide a gateway for developers to access data and services from various platforms, enabling them to build dynamic applications. Free APIs, in particular, are valuable for learning and experimentation, allowing developers to create projects like weather apps or currency converters without additional costs. In this guide, you will learn how to integrate Web APIs into your projects, explore two real-world case studies, and follow best practices to maximize their utility.
In this section, we’ll cover the following topics:
- Getting Started with Free APIs
- Steps to Implement Free APIs in Web Projects
- Case Study: Implementing Web APIs
- Best Practices for Using Web APIs
Getting Started with Free APIs
Free APIs let developers integrate real-time data into projects without upfront costs. Whether you’re fetching weather updates, news, or currency rates, understanding how to find, authenticate, and use APIs is crucial. Here’s a beginner-friendly guide to getting started.
Finding Reliable Free APIs
Choosing the right API is important for your project to work smoothly. Here’s what to look for and how to evaluate reliability:
- Easy-to-Understand Instructions: Look for APIs with clear guides, including:
- Endpoints: URLs to send requests.
- Parameters: Data to send or receive.
- Example Responses: Sample output from the API.
- Helpful Community: Check for forums, FAQs, or community support to resolve potential issues.
- Works Consistently: Choose APIs with minimal downtime to avoid disruptions.
Tips
You can ask ChatGPT to help assess an API’s reliability. Use a prompt like:
"Can you help me evaluate the [API Name]? Here’s the documentation URL: [URL]. Let me know if it has clear instructions, good community support, and reliability."
List of Popular Free APIs
Here are some beginner-friendly APIs to try:
- OpenWeatherMap: Weather forecasts and real-time data.
- NewsAPI: Fetch news headlines from various sources.
- ExchangeRate-API: Get real-time currency exchange rates.
- The Cat API: Fun, random cat images.
- Unsplash API: Free, high-quality images for projects.
Understanding API Authentication (API Keys, OAuth, etc.)
Most APIs require authentication to protect their services:
- API Keys: A unique code provided by the API service when you register.
- OAuth: A more secure way to access APIs, often used for apps that connect to user accounts.
- Token-Based Authentication: Tokens work like temporary keys that often need refreshing.
For beginners, APIs using API keys are the easiest to start with.
Steps to Implement Free APIs in Web Projects
Registering for API Keys
- Sign Up: Create an account on the API provider’s website.
- Generate Your Key: Navigate to the API dashboard and retrieve your unique key.
- Understand Usage Limits: Many APIs have rate limits (e.g., requests per minute). Make sure your project stays within these limits to avoid service interruptions.
Making API Requests and Parsing JSON Data
Once you have an API key, you can start making requests to fetch data. Most APIs return data in JSON format, which can be easily parsed and used in your project.
Making a GET Request
const apiKey = "your_api_key_here";
const apiUrl = `https://api.example.com/data?apiKey=${apiKey}`;

fetch(apiUrl)
  .then((response) => {
    if (!response.ok) {
      throw new Error("Failed to fetch data");
    }
    return response.json();
  })
  .then((data) => {
    console.log("Data:", data);
  })
  .catch((error) => console.error("Error:", error));
Parsing JSON Data
JSON data can be accessed like JavaScript objects:
const jsonResponse = {
  name: "Example",
  description: "Sample JSON Data",
};

console.log(jsonResponse.name); // Output: Example
console.log(jsonResponse.description); // Output: Sample JSON Data
Managing Asynchronous Calls in JavaScript (When Required)
APIs are asynchronous by nature. Use async/await or .then() to ensure your application handles data correctly without blocking the execution of other tasks.
Using async/await for API Calls
const fetchData = async () => {
  try {
    const response = await fetch("https://api.example.com/data");
    if (!response.ok) {
      throw new Error("Failed to fetch data");
    }
    const data = await response.json();
    console.log("Data:", data);
  } catch (error) {
    console.error("Error:", error);
  }
};

fetchData();
Case Study: Implementing Web APIs
This section explores two case studies: a weather app and a currency converter.
Preparing for Practice Files
This guide uses a hands-on approach, requiring the following folder structure and files:
/your-project-folder/
  |─08-02-what-is-ajax/  (<- sub-folder)
    |─ case-1-weather-api/
      |─ index.html
      |─ styles.css
      |─ script.js
    |─ case-2-currency-converter/
      |─ index.html
      |─ styles.css
      |─ script.js
For your convenience, these files are also available on our GitHub repository.
Web API Case 1: Integrating a Weather API
In this case study, we’ll create a simple weather app that fetches and displays real-time weather data using the OpenWeatherMap API. This step-by-step guide will walk you through the process, including the code and instructions to run it locally.
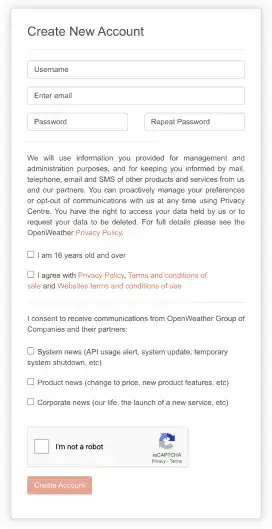
Sign Up and Get an API Key
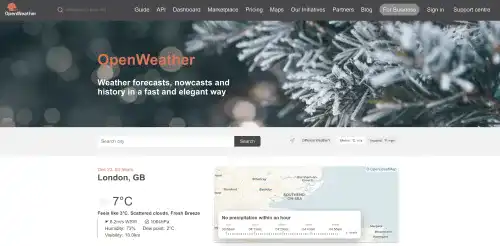
- Visit OpenWeatherMap
- Create a free account.
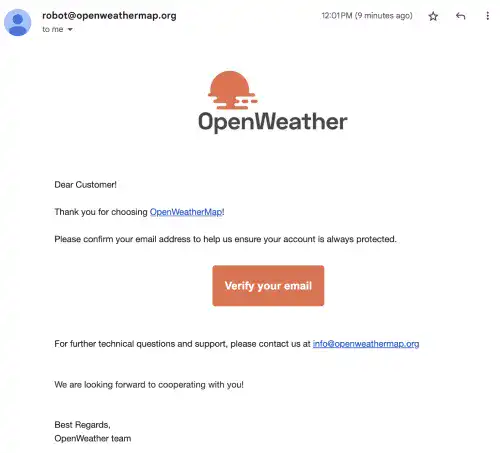
- Verify your email address
- Once logged in, navigate to the API Keys section in your dashboard and generate a new API key.

- Copy the API key, as you’ll need it in your JavaScript code.
Write the Code
<!DOCTYPE html>
<html lang="en">
  <head>
    <meta charset="UTF-8" />
    <meta name="viewport" content="width=device-width, initial-scale=1.0" />
    <title>Weather App</title>
    <link rel="stylesheet" href="styles.css" />
  </head>
  <body>
    <div class="container">
      <h1>Weather Information</h1>
      <input type="text" id="cityInput" placeholder="Enter City Name" />
      <button id="getWeather">Get Weather</button>
      <div id="weatherResult"></div>
    </div>
    <script src="script.js"></script>
  </body>
</html>
body {
  font-family: Arial, sans-serif;
  text-align: center;
  margin: 0;
  padding: 0;
  background-color: #f5f5f5;
}
.container {
  max-width: 400px;
  margin: 50px auto;
  padding: 20px;
  background: white;
  border-radius: 8px;
  box-shadow: 0 4px 6px rgba(0, 0, 0, 0.1);
}
input {
  width: calc(100% - 20px);
  padding: 10px;
  margin-bottom: 10px;
  border: 1px solid #ccc;
  border-radius: 4px;
}
button {
  padding: 10px 20px;
  color: white;
  background-color: #007bff;
  border: none;
  border-radius: 4px;
  cursor: pointer;
}
button:hover {
  background-color: #0056b3;
}
#weatherResult {
  margin-top: 20px;
  font-size: 1.2em;
}
// Replace 'your_api_key_here' with your actual API key from OpenWeatherMap
const apiKey = "your_api_key_here";

document.getElementById("getWeather").addEventListener("click", () => {
  const city = document.getElementById("cityInput").value.trim(); // Trim spaces

  if (!city) {
    alert("Please enter a city name!");
    return;
  }

  // Encode the city name to handle spaces and special characters
  const encodedCity = encodeURIComponent(city);

  // Construct the API URL
  const apiUrl = `https://api.openweathermap.org/data/2.5/weather?q=${encodedCity}&units=metric&appid=${apiKey}`;

  fetch(apiUrl)
    .then((response) => {
      // Check if the response is not OK
      if (!response.ok) {
        if (response.status === 404) {
          throw new Error("City not found. Please check the spelling.");
        }
        throw new Error(
          "Failed to fetch weather data. Please try again later."
        );
      }
      return response.json();
    })
    .then((data) => {
      // Display weather information
      const weatherInfo = `
                <p><strong>City:</strong> ${data.name}</p>
                <p><strong>Temperature:</strong> ${data.main.temp} °C</p>
                <p><strong>Condition:</strong> ${data.weather[0].description}</p>
            `;
      document.getElementById("weatherResult").innerHTML = weatherInfo;
    })
    .catch((error) => {
      // Display error messages in red
      document.getElementById("weatherResult").innerHTML = `
                <p style="color: red;">Error: ${error.message}</p>
            `;
    });
});
Step-by-Step Explanation of the JavaScript Code
- Define the API Key: Replace
your_api_key_herewith your actual API key from OpenWeatherMap. This key authenticates your requests to the API. - Add Event Listener: The
clickevent listener on the "Get Weather" button triggers the weather data fetch. - Validate User Input: The
cityvariable captures the user’s input, which is checked to ensure it’s not empty. - Construct the API URL: The
apiUrlincludes the API key and the city name entered by the user. It requests weather data in metric units. - Fetch API Data: The
fetchfunction sends a GET request to the API. If the response is not successful (!response.ok), an error is thrown. - Parse and Display Data: The weather data is extracted from the JSON response and displayed dynamically in the
#weatherResultdiv. - Error Handling: Any issues, such as invalid city names, are caught and displayed as error messages.
Running the Code Locally
Opening the index.html file directly in your browser won’t work for API calls due to restrictions like CORS (Cross-Origin Resource Sharing). Instead, use Live Server, a simple extension in Visual Studio Code, to run your project.
If you haven’t installed the extension yet, do so from the VS Code Extensions Marketplace. Then, right-click on index.html and select "Open with Live Server".
This will launch your project in a local development environment. Once the page loads, enter a city name in the input field, click "Get Weather," and view the results displayed on the page.
Watch this video to see what the small web app looks like:
Web API Case 2: Creating a Currency Converter with an Exchange Rate API
In this case study, we’ll create a simple currency converter that fetches real-time exchange rates using the ExchangeRate-API. This step-by-step guide will walk you through the process, including the code and instructions to run it locally.
Sign Up and Get an API Key
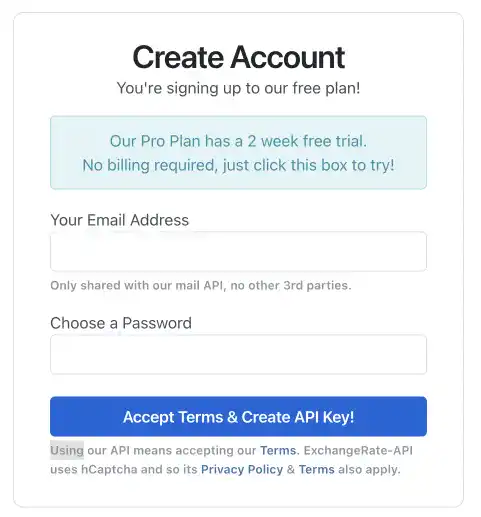
- Visit ExchangeRate-API.
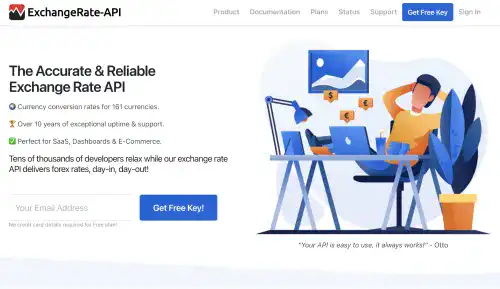
- Create an account (Register for API Key.)
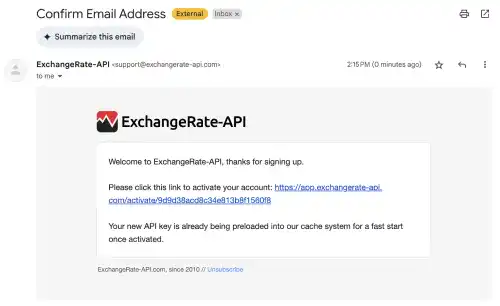
- Verify your email address
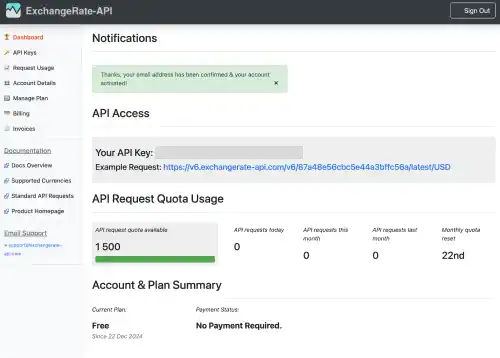
- Copy the API key, as you’ll need it in your JavaScript code.
Write the Code
<!DOCTYPE html>
<html lang="en">
  <head>
    <meta charset="UTF-8" />
    <meta name="viewport" content="width=device-width, initial-scale=1.0" />
    <title>Currency Converter</title>
    <link rel="stylesheet" href="styles.css" />
  </head>
  <body>
    <div class="container">
      <h1>Currency Converter</h1>
      <div class="input-group">
        <label for="amount">Amount:</label>
        <input type="number" id="amount" placeholder="Enter amount" />
      </div>
      <div class="input-group">
        <label for="fromCurrency">From:</label>
        <input type="text" id="fromCurrency" placeholder="e.g., USD" />
      </div>
      <div class="input-group">
        <label for="toCurrency">To:</label>
        <input type="text" id="toCurrency" placeholder="e.g., EUR" />
      </div>
      <button id="convertButton">Convert</button>
      <div id="conversionResult"></div>
    </div>
    <script src="script.js"></script>
  </body>
</html>
body {
  font-family: Arial, sans-serif;
  text-align: center;
  margin: 0;
  padding: 0;
  background-color: #f4f4f9;
}
.container {
  max-width: 400px;
  margin: 50px auto;
  padding: 50px;
  background: white;
  border-radius: 8px;
  box-shadow: 0 4px 6px rgba(0, 0, 0, 0.1);
}
.input-group {
  margin-bottom: 15px;
  text-align: left;
}
label {
  display: block;
  margin-bottom: 5px;
}
input {
  width: 100%;
  padding: 8px;
  border: 1px solid #ccc;
  border-radius: 4px;
  box-sizing: border-box;
}
button {
  padding: 10px 20px;
  color: white;
  background-color: #007bff;
  border: none;
  border-radius: 4px;
  cursor: pointer;
}
button:hover {
  background-color: #0056b3;
}
#conversionResult {
  margin-top: 20px;
  font-size: 1.2em;
  color: #333;
}
// Replace 'your_api_key_here' with your actual ExchangeRate-API key
const apiKey = "your_api_key_here";

document.getElementById("convertButton").addEventListener("click", () => {
  const amount = parseFloat(document.getElementById("amount").value.trim());
  const fromCurrency = document
    .getElementById("fromCurrency")
    .value.trim()
    .toUpperCase();
  const toCurrency = document
    .getElementById("toCurrency")
    .value.trim()
    .toUpperCase();

  if (isNaN(amount) || !fromCurrency || !toCurrency) {
    alert("Please enter a valid amount and currency codes!");
    return;
  }

  const apiUrl = `https://v6.exchangerate-api.com/v6/${apiKey}/pair/${fromCurrency}/${toCurrency}`;

  fetch(apiUrl)
    .then((response) => {
      if (!response.ok) {
        throw new Error("Failed to fetch exchange rate data.");
      }
      return response.json();
    })
    .then((data) => {
      if (data.result === "error") {
        throw new Error(data["error-type"]);
      }

      const exchangeRate = data.conversion_rate;
      const convertedAmount = (amount * exchangeRate).toFixed(2);

      document.getElementById("conversionResult").innerHTML = `
                <p>${amount} ${fromCurrency} = ${convertedAmount} ${toCurrency}</p>
            `;
    })
    .catch((error) => {
      console.error("Error:", error);
      document.getElementById("conversionResult").innerHTML = `
                <p style="color: red;">Error: ${error.message}</p>
            `;
    });
});
Step-by-Step Explanation of the JavaScript Code
- Define the API Key: Replace
'your_api_key_here'with your actual API key from ExchangeRate-API. This key authenticates your requests to the API. - Add Event Listener: The
clickevent listener on the "Convert" button triggers the exchange rate fetch and calculation. - Validate User Input:
amount: Must be a number greater than 0.fromCurrencyandtoCurrency: Must be valid currency codes (e.g., USD, EUR).
- Construct the API URL: The
apiUrlincludes the API key, source currency, and target currency. - Fetch API Data: The
fetchfunction sends a GET request to the API. If the response is not successful (!response.ok), an error is thrown. - Calculate and Display the Converted Amount:
- The API returns the conversion rate, which is used to calculate the converted amount.
- The result is displayed dynamically in the
#conversionResultdiv.
- Error Handling: Catches issues such as invalid input, API downtime, or incorrect currency codes and displays appropriate error messages.
Running the Code Locally
Opening the index.html file directly in your browser won’t work for API calls due to restrictions like CORS (Cross-Origin Resource Sharing). Instead, use Live Server, a simple extension in Visual Studio Code, to run your project.
If you haven’t installed the extension yet, do so from the VS Code Extensions Marketplace. Then, right-click on index.html and select "Open with Live Server". This will launch your project in a local development environment.
Once the page loads, enter an amount, the source currency, and the target currency, then click "Convert" to view the results displayed on the page.
Watch this video to see what the small web app looks like:
Best Practices for Using Web APIs
To build secure, efficient, and reliable applications, follow these best practices when working with Web APIs:
- Protect Your API Keys: Never expose API keys in your code, especially in public repositories. Use environment variables or server-side storage to keep them secure. If a key is compromised, regenerate it immediately.
- Respect Usage Limits: Understand your API’s rate limits and quotas (e.g., requests per minute or daily caps). Implement logic to delay or batch requests when necessary to avoid exceeding these limits.
- Handle Errors Gracefully: Anticipate potential issues like invalid inputs, API downtime, or exceeded rate limits. Display user-friendly error messages to inform users about the problem without disrupting their experience.
- Optimize API Requests: Request only the data you need by specifying filters or parameters in your API calls. This reduces response times, improves app performance, and minimizes unnecessary data usage.
By adhering to these practices, you can ensure your applications are robust, efficient, and maintainable.
Reference links: